Saturday, February 22, 2014

Blog 16: Advisory Meeting #2

EQ:
How can a photographer best achieve ideal lighting during a portrait session?

Answer #2:
A photographer can best achieve ideal lighting during a portrait session by adding light and using other lighting equipment (ex: reflectors, strobes).

Details:
Reflectors: Basically what reflectors do is they help control the direction of the light. For example a five in one reflector has a diffuser disk that has a cover with different fabrics; white, silver, gold, and black, what these do is either give the photo a more natural look(white), or edgy look(silver), or a warm look(gold) or absorb the light that might be bouncing off of objects near by(black).

Softboxes: Softboxes are enclosures that are attached to the light with reflective interior surfaces and translucent material that is positioned in front of the light. Pretty much what a softbox does is diffuse and soften the light to make it less harsh on the subject and create better shadows.

Lights: Adding light is essential when shooting the subject in a studio or even outdoors with their back to the sun. So example would be a strobe light with an umbrella reflector to act as a fill light so that we're not getting a silhouette.  

Source(s):
Lighting for Digital Photography: From Snapshots to Great Shots by Syl Arena
Lighting Essentials by Simon Mclntyre and Andrew Langcake

Conclusion:
A photographer can achieve ideal lighting through the use of reflectors, softboxes, and additional lights working together.

Thursday, February 13, 2014

Blog 15: Independent Component 2 Approval

Content:

1. I plan on completing my 30 hours by working with the camera more, using a tripod for different things and working with studio lights and reflectors.

2. My evidence will be shown through photos that I take or photos of me working with equipment.

3. This will help me explore my topic more in depth by allowing me to stabilize the camera(tripod), work with added light instead of just natural light, and to shape light to fit my needs for a photo.

4. *log on right hand side of blog*

Thursday, February 6, 2014

Blog 14: Independent Component 1

LITERAL
 a) I, Symphony Moreno, affirm that I completed my independent component, which represents 30 hours of work.
 b) Sources: Renee Moreno, Jack Bohlka, Portrait Lighting - Names for different portrait lighting set-ups in photography (article) 
 c) Component 1 log is on the right-hand side of the blog
 d) What I have completed is portraits of my sister, each one has a different lighting style or composition. 

INTERPRETATIVE

 The most significant part of this component was the few lighting styles that I learned and a few techniques I learned when adjusting my camera settings ( manual focus, slow shutter speed, wide aperture, ect.,). All of these things are demonstrated in these photos that I took of my sister:


In this photo, I had my sister turn her head slightly towards the light so that we could create the effect of "short lighting" which is where the short side of the face is lit up.


 I had my sister turn her head towards the light a little bit more to create a "key triangle" this is on the right side of her face under her eye. The lighting style where the key triangle is shown is known as Rembrandt.


 In this final photo I had my sister face me fully while the lighting was farther off to my left so that only half of her face is lit. This is called split lighting.
Before taking any of these photos I had to preset my camera to the conditions of the lighting in the room which was very little, so the settings that I had listed above( slow shutter speed, wide aperture, manual focus, high iso) were used through out. Originally I was going to demonstrate five lighting styles but as I was working out of my home I found that I couldn't fully achieve the other two (broad and butterfly) without them coming out very badly.  Here is just some more evidence that I was in ROP working on all of this:


APPLIED

This helped me with the foundations of my project because I realized that photography isn't just snapping photos; you have to really think about what you're doing when pre-setting the camera or setting up the lighting and the room that you're going to shoot in.

Saturday, February 1, 2014

Blog 13: Lesson 2 Reflection

1. Positive Statement:

For my presentation, I am most proud of the demonstrations that I did on the camera to really kind of show what I was talking about.

2. Questions to Consider

   a. What assessment yould you give yourself on your Lesson 2 Presentation (self-assessment) ?

P-/AP+

  b. Explain why you deserve that grade using evidence from the lesson 2 component contract.

I think I deserve at least one of those because my presentation overall was pretty well-rounded, except I didn't cite my sources.

3.  What worked for you in Lesson 2?
Having the cameras for everybody to try and apply what I had just talked about while taking photos.

4. ( What didn't work) If you had a time machine, what would you have done differently to improve your lesson 2?
Some of the cameras either didn't have a battery or were just completely dead, if I could change that it would probably be to make sure that every camera is charged and has a battery before my presentation.

5. Finding Value

What do you think your answer #2 is going to be?

 I think my answer #2 would be along the lines of equipment such as, tripods and off-camera flash.

January

So this month I spent mostly preparing for my 30 minute presentation. What I did to really prepare was read up on the different camera settings and their uses.
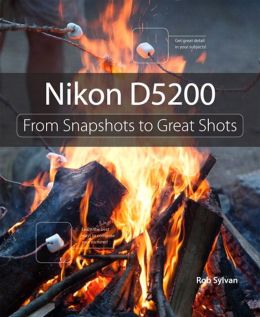
[ This is the book I read to learn the different camera settings among other things.]
Overall I didn't do much other than that except take a really nice photo for ROP when we worked on abstract photography, I'll probably have that up after it's been graded.